

Beautiful garden paths – an important detail of the design of the infield. They provide convenient access to the main buildings and zones and perform a decorative function, decorating the garden, combining all its elements. It is not necessary to be a landscape designer or a builder to make garden paths in the country with your own hands; however, you will definitely need some knowledge.

Stages of creation
To make garden paths on your plot, you will need to draw up a plan of action, stock up on appropriate materials and tools and consistently perform all the work, strictly following the instructions. Creating your own tracks includes the following steps:
- layout;
- material selection;
- markup;
- training;
- Styling.
Garden paths
At this stage, you will have to decide on the location, length, width, and purpose of future garden paths. These characteristics depend on the appearance and location of the house, other buildings, green spaces. Straight lines of paths will pave the shortest path between the selected “points”. However, in landscape design, far from the strict layout of city streets, winding garden paths are often used. They look more picturesque, bending around flowerbeds, rockeries, alpine slides, ponds, gazebos and other elements of garden decoration, as in the example in the photo below.
You can decorate your garden with a combination of straight and curving paths. So, for example, even as an arrow, the walkways can connect the entrance to the plot and the porch of the house, the gate, and the garage, run around the cottage or a rectangular bath. In any case, you need to draw a plan with the exact location of all objects, and then make a sketch in color or 3D-visualization of the project.

Material selection
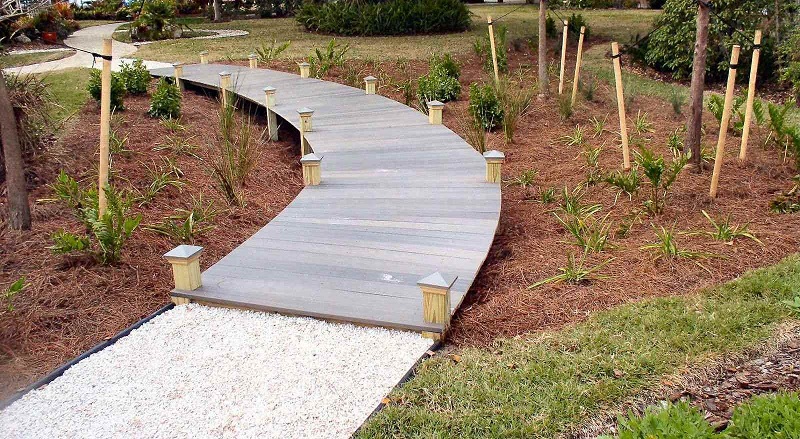
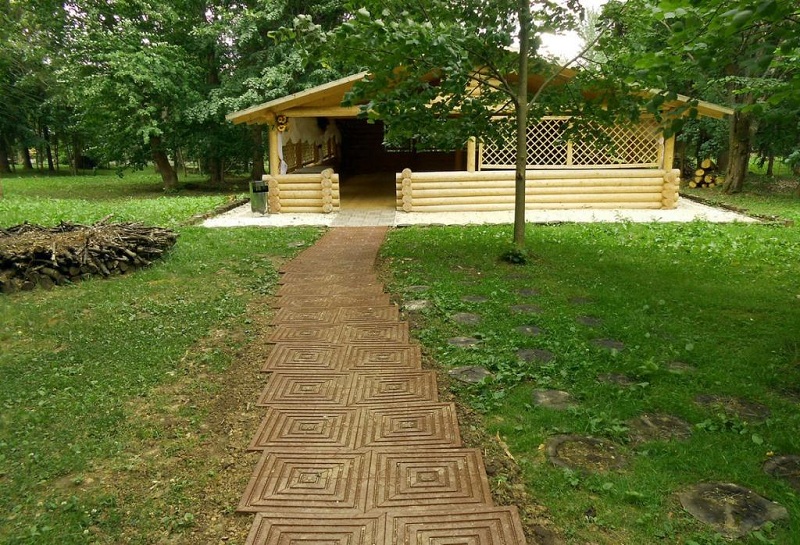
The material is chosen based on the style of buildings and design of the infield. Ideally, the color and texture of the track should correspond to the finishing of the facade of the house or cottage. So, the concrete will be in harmony with the houses of the urban, minimalist style, high-tech style. For houses of rural type suitable path of gravel, paved with cobblestones, pebbles, bricks. A typical country house of timber or logs will complement the trails of woody cuts or stumps, while the board, garden parquet, and other similar materials look good in tandem with modern buildings in the spirit of Scandinavian villas, chalets, and brick houses, as in the photo.

Markup
At this stage it is required with your own hands the marking: to dig in the pegs, to stretch the twine or to pour the lines with lime. It is necessary to take into account the location of all objects, the distance to them from the edge of the walkway, to consider how convenient this route will be for you, which view will open during the walk. The width is determined not only by convenience and aesthetic characteristics; it also depends on the material used, its layout, the size of individual elements.
Preparing for the laying of tracks with their own hands
If you want the garden paths to last for a long time, not overgrown with grass over time and not split into its constituent elements, it is necessary to carry out serious training.
- According to the markings, a layer of sod and soil 15-20 centimeters thick is removed. It is necessary that the trench depth be the same throughout its length.
- The edges are marked with wooden boards made of planks, but if you plan to enclose a path in concrete curbs, they are reinforced with reinforcing pins hammered into the ground and leveled to a height by construction level (curbs must extend 7-10 centimeters above the surface).
- Special material is laid on the ground – geotextile, which allows moisture and air to pass through, but prevents the germination of plants. If you want to make your own path with the alternation of grass and stone plots, it will be necessary, after laying the slabs or cobblestones, to fill the gaps with earth and sow with grass.
- Gravel or crushed stone mixed with cement or sand is poured into the trench and compacted. The thickness of this layer is 5-10 centimeters. It is recommended to pour water over the gravel-cement or sand backfill several times and ram it again to seal the cushion as much as possible.
- In most cases, a layer of sand is poured over the gravel and is also compacted.
As you can see, it’s not so difficult to prepare the trench yourself; moreover, this process can be simplified depending on the material chosen.

Main types of materials for garden paths
Consider the main types of paths that are not difficult to make with your own hands from the available materials. This category includes coatings from:
- chips;
- sand and gravel;
- river pebbles;
- wood;
- natural stone;
- bricks;
- concrete;
- plastic.
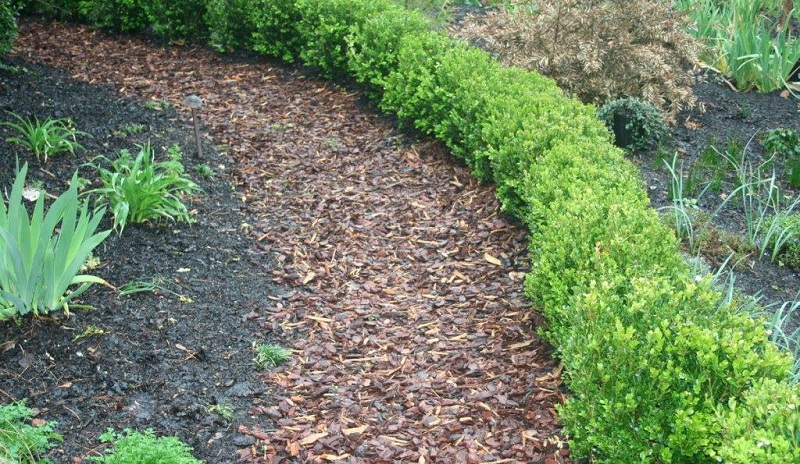
Garden paths from a sliver
The easiest way to make tracks from wood chips. You need to stock up with the right amount of decorative chips of the selected shade and put it on a sandy pillow. The disadvantage of this method is that you have to periodically sprinkle new chips, updating the paths, but this garden path looks very bright and beautiful, as in the photo below, in harmony with any landscape design.
Sand and gravel
These garden paths do it yourself is also quite simple. A trench dug and covered with geotextile is covered with gravel or sand, wetted and compacted. You can use gravel or sand of different sizes, colors, alternate backfill and even lay out certain patterns, but they will have to be periodically updated and adjusted, or you can use cement as a fixative to keep the pattern on the track for a long time.

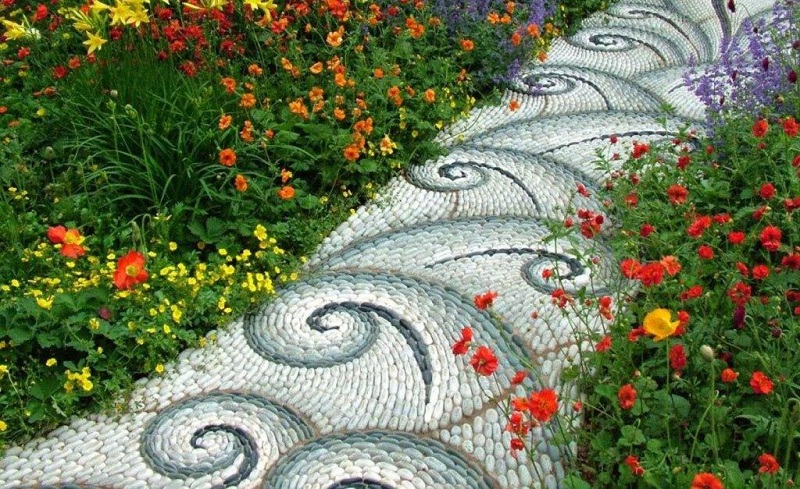
River pebbles
This method of garden decoration with your own hands requires a large amount of work, a lot of patience and free time. You will need cement, rounded river pebbles of different shades, a sponge, a rubber hammer, sand, water, and level.
- Stones are sorted by color and size.
- Choose a drawing for the track or make a sketch, focusing on your own imagination.
- For convenience, you can divide the trench with the rammed gravel-sand base into squares. These squares represent the sides of the cement (sand with cement mixed in a ratio of 3 to 1 or 4 to 1 and add water).
- The first layer of stones of one shade is laid on the sides, compacted with a hammer and leveled at the construction level.
- In the same way, gradually, they lay out the entire conceived pattern, leveling and tamping down the pebbles.
- The pebble mosaic is rinsed with water from a hose, washing away the remnants of cement from the pattern and strengthening the solution.
- In a similar pattern laid out the remaining squares.
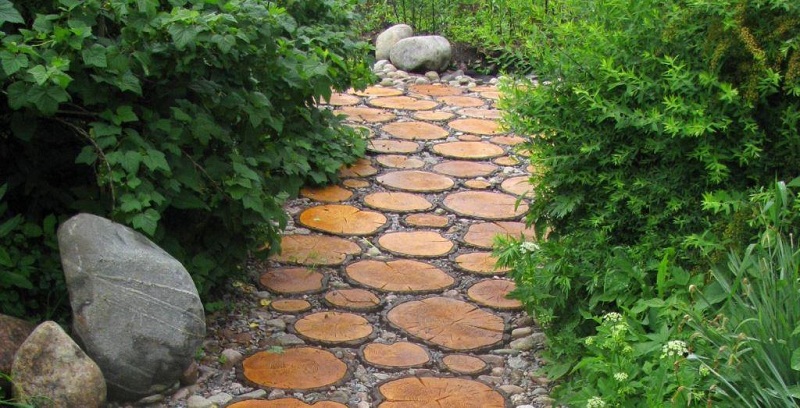
Tree
Natural wood is an excellent material for making tracks with your own hands, but working with it requires certain skills, and the wooden elements themselves require special processing. Trails from woody cuts look very nice. For the convenience of paving take dry logs of hardwood of different diameters. Cuts of equal height (they must be twice as high as the walls of the trench, taking into account the cushion of gravel) are carefully cut into a chainsaw and polished with a machine. The resulting “hemp” is treated with an antiseptic, dried and coated with a special varnish or tar. In the process of installing the saws with their own hands, the space between them is filled with sand and compacted. Hemp of different sizes allows you to install them as close as possible to each other, as in the photo.
Another variant of wooden tracks is boarded, fixed on a crate or concrete supports and covered with aseptic and other protective structures. The lathing is not only used for fixing the boardwalk but also provides good ventilation.
A natural stone
To create such a walkway with your own hands, you will need processed granite or sandstone. The material itself is not cheap, but the path will delight you and your loved ones for many years. You can stone a trench with stones in two ways: laying on a sand or concrete pad. In the first version, the stones are laid on sand, poured into a trench over gravel and geotextile, the gaps are filled with sand, the path is rammed and treated with water. In the second variant, a formwork is made over the sand layer and it is poured with concrete, then again it is covered with sand and the stone is laid out.

Brick
Paving a garden path with your own hands with a brick is a rather laborious task. On top of a layer of sand, leveled with a rule, bricks are laid according to the intended pattern, hammering them into the sand with a rubber hammer. For durability, the bricks are bonded with cement-based glue, then sprinkled with sand to fill the gaps, and sweep away the remnants. It is recommended to use bricks, pre-treated with primer and special varnish.

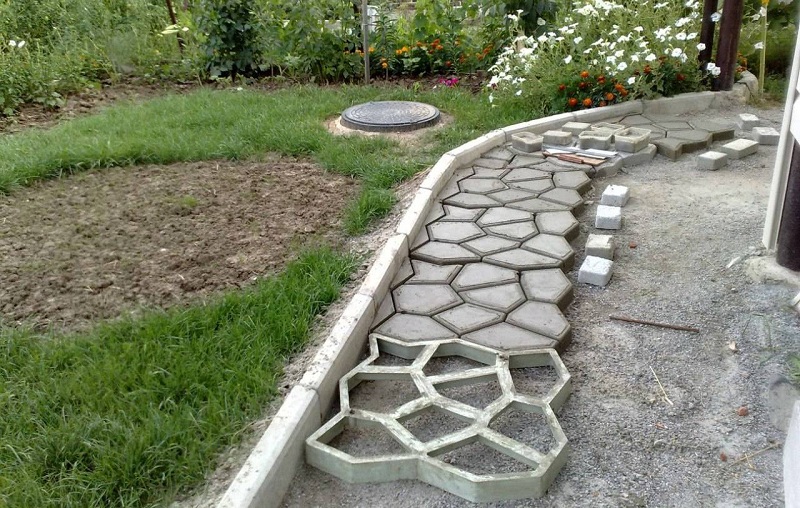
Concrete
Making a concrete track with your own hands is also real. To do this, sand is poured into a trench with formwork or curbs, tamped with it, then rubble and tamped again. Next, the reinforced mesh is laid and the cement mortar is poured, which is equal to the rule. When using the mold to imitate masonry, the mortar is poured in two layers, the first – in the usual way, the second – with the forms, after the first has dried.
Alternatives
You can easily make garden paths with your own hands, using grass flooring or removable plastic panels that are attached to each other. A more expensive, but much more beautiful option – garden parquet made of natural wood. It is mounted on the same principle as plastic squares and is laid on tamped gravel or crushed stone.
Finishing touch
In addition to the concrete or brick edging garden path can be decorated in other ways. Choose the material you like and decorate the garden with scenic paths with your own hands, fringing the paths with colored decorative wood chips, beautiful cobblestones, pegs, colored wooden fences, low-growing plants (flowers, bushes). Great idea – solar-powered lamps that will turn your site into a fabulous corner in the dark.