
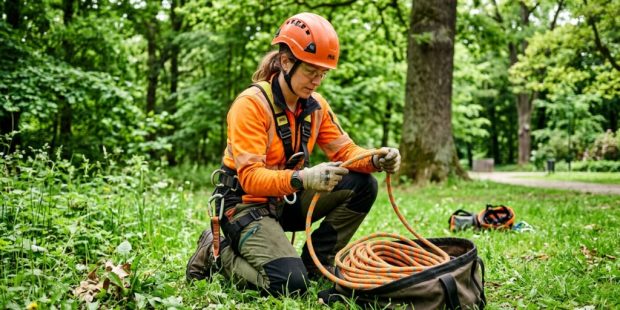
You’ve watched the videos, you’ve heard the horror stories about snapped ropes, and now you’re ready to buy your first kit. But the moment you open a search tab, you’re hit with a wall of prices, weird jargon like “16-strand” and “low-elongation,” and a sinking feeling you’re about to overpay for something you don’t fully understand. The good news? You don’t need to drain your savings to stay safe. The real challenge isn’t finding a cheap option—it’s knowing which compromises are acceptable and which ones could put you in danger. That’s where solid affordable climbing rope kit reviews become your best friend. We’re going to break down exactly how to strip away the marketing noise, compare the specs that actually matter, and choose a kit that balances safety, durability, and price without turning your climb into a gamble.
What Defines an “Affordable” Arborist Rope Kit in 2025?
An affordable kit isn’t just the cheapest bundle on the shelf; it’s the one that offers the lowest cost per climb over its lifespan. Most budget kits fall between $150 and $300, but within that range, you’ll find massive variations in rope construction, hardware quality, and included accessories.
Breaking Down the Core Components of a Kit
Every kit typically includes the rope, a friction hitch cord, a carabiner, and often an eye-and-eye sling. However, “included” doesn’t mean “quality.” Budget kits often bundle a decent rope with hardware that’s heavy, unreliable, or even oversized for the rope diameter—which can compromise your ability to tie critical knots like a blakes hitch or a distel.
Why “Cheap” Upfront Often Means “Expensive” Later
Let’s talk about wear cycles. A cheap rope with a low strand count may feel fine for the first month, but it tends to glazing faster and loses its grip in friction hitches. If you’re climbing weekly, you’ll replace a $120 rope every four months. Instead, a slightly pricier 32-strand rope might last double that time. Always calculate cost-per-year, not just the sticker price.
Identifying Hidden Costs in Budget Bundles
Look for kits that force you to buy extra gear immediately. Some “affordable” bundles exclude a climbing harness or do not include a throw line, meaning you’ll spend another $200 just to use what you bought. A true affordable kit should be operational out of the box—minus your harness and helmet.
Static vs. Low-Stretch Rope: Which Should You Choose?
For arborist work, you absolutely need low-elongation rope, often labeled as “static.” If a rope stretches even 5% under load, you’ll bounce around like a rubber band, making precise cuts impossible and increasing the risk of hitting the trunk hard. Always choose a rope with less than 2% stretch at 10% of breaking strength.
Understanding the Different Rope Constructions
You’ll see two main types: double-braid and kernmantle. Double-braid has a braided core and braided cover, offering good grip and flexibility. Kernmantle has a parallel core with a braided sheath, which handles dynamic loads better. For climbing, double-braid is preferred for its behavior in friction hitches, but kernmantle can work if the sheath is tight enough.
How Rope Diameter Affects Your Gear Compatibility
Most affordable kits feature ropes between 11.5mm and 13mm. Larger diameters (13mm) are easier on the hands and work with more mechanical devices, but they are heavier. Smaller diameters (11.5mm) are lighter but require specifically sized hitch cords to function safely. Always check the recommended rope diameter for your friction hitch, not just the carabiner.
The “Knee-Knocking” Test for Sheath Quality
Rub the rope sheath against your thumbnail. If you feel deep fuzz or see loose fibers, the sheath is too soft and will abrade quickly. Quality affordable ropes have a dense, tight sheath that feels slick but not slippery. This simple “fingernail test” reveals more about rope longevity than any spec sheet.
Why Does Friction Hitch Cord Selection Make or Break a Budget Kit?
You can buy the best rope in the world, but if the included hitch cord is too springy or too stiff, you will struggle to descend smoothly. The hitch cord is your braking system—it wraps around the climbing line and grips when loaded. A lousy cord will cause jerky stops or, worse, slip entirely.
Prusik vs. Mechanical Hitches: Pros and Cons
Most budget kits include a prusik loop, which is simple and cheap. However, prusiks can bind tightly after heavy loads, making them hard to release. Mechanical hitches (like a hitch climber pulley) are smoother but add cost. If the kit uses a prusik, ensure the cord diameter is 1-2mm smaller than the main rope for proper grip.
Matching the Hitch Cord Eye Size for Easy Adjustment
If the kit includes an eye-to-eye sling, check if the eyes are fused or sewn. Sewn eyes are more expensive but won’t loosen over time. Fused eyes can slip if the heat cuts through the core, creating a weak point. If you see a heat-sealed eye on a budget kit, consider replacing the sling before your first big climb.
Signs a Hitch Cord is Too Low Quality to Trust
When you squeeze the cord, does it spring back instantly? If it feels mushy or retains a dent, the inner fibers are already broken down. Never buy a kit with a hitch cord covered in excessive wax or oil—it’s masking old material. The cord should feel dry, flexible, and firm.
Which Carabiners Should an Affordable Kit Use?
Your carabiner is your life support connection. Look for a locking carabiner rated to at least 22kN in the major axis. The key is to avoid aluminum carabiners with plastic locking sleeves—they break in cold weather and can cross-load easily.
HMS vs. Standard Oval: Which is Safer for Climbing?
HMS (Hall-Munson-Maillard) carabiners are pear-shaped, designed to hold a prusik hitch and a pulley together. Standard ovals are fine for rigging but not ideal for climbing systems. Ensure your kit includes an HMS carabiner, preferably with a screw-lock or auto-lock mechanism. Wire-gate carabiners are light but tend to freeze up in icy conditions.
Evaluating Gate Clearance and Opening Width
If the gate opening is less than 18mm, it will be difficult to clip onto a harness bridge or around a thick branch. Test this by trying to clip the carabiner onto the leg of your jeans. If it feels awkward, it will be five times harder when wearing gloves and suspended upside down.
Why the “Proof Load” Sticker Matters More Than Breaking Strength
Many budget carabiners list a high ultimate breaking strength (like 30kN) but have a low proof load (the safe load without permanent deformation). Always look for a proof load of at least 80% of the breaking strength. If this isn’t marked, assume it’s not rated for life support—avoid it.
How Many Accessory Cords and Slings Are Actually Necessary?
Most kits include one eye-and-eye sling and maybe a couple of 10mm accessory cords. But for a full day of climbing, you need at least two slings (one for the primary system, one as a backup). Accessory cords are also used for foot loops and adjustable lanyards.
Using Accessory Cords for Climbing Systems
You’ll need a 24-inch and a 32-inch eye-to-eye sling. The shorter one functions for the main hitch, while the longer one works for adjusting a foot loop. Don’t waste money buying huge hanks of cord if the kit gives you enough to tie custom lengths—just learn how to splice or tie a proper ring bend.
When to Swap Out Included Flipline Clips
Some budget kits include a lanyard but use cheap snap hooks rather than carabiners. Snap hooks close over the bark and can open if pressed against a limb. Swap these out for a proper locking carabiner and a separate lanyard adjuster. It’s an extra $60 but totally worth it for your teeth.
Are Pulley Systems Worth the Extra Money?
If the kit includes a basic rope wrench or a pulley, that’s excellent. A pulley reduces friction on your hitch, making ascent and descent smoother. If the kit doesn’t have one, plan to buy a simple closed pulley with a swivel—it will save you hours of energy on tall trees.
How to Test the Rope’s Packaging and Termination Quality?
When you unbox the kit, the first thing to do is cut off three inches from each end of the rope and inspect the cross-section. The core should look like a solid bundle of thin, parallel fibers, not a tangled mess. If you see air pockets or loose strands, the manufacturing process is flawed.
The “Unrolling” Test for Twisting and Memory
Lay the rope straight out on the ground. If it coils back into loops wire-like, it has too much memory. A good rope should lie flat with minimal curling. High memory means the rope will twist around your legs when climbing, making movement awkward and potentially creating dangerous wrapping.
Checking for Factory Splice Integrity
If the kit has a terminally spliced eye (a loop sewn or braided at the end), pull on it hard. A proper splice won’t budge. If you see any gap between the bury (where the tail hides) and the sheath, return the kit immediately. A failed splice at height is a fatal flaw.
Why You Should Cut and Splice Your Own Ends Initially
If the kit’s rope ends are just taped or heat-cut, don’t trust them. Learn to do a back splice or use a proper rope end cap. Taped ends unravel quickly in a tree. A properly whipped rope end prevents fraying and keeps the core from sneaking out of the sheath.
Can You Use a Rope Kit for Both Climbing and Rigging?
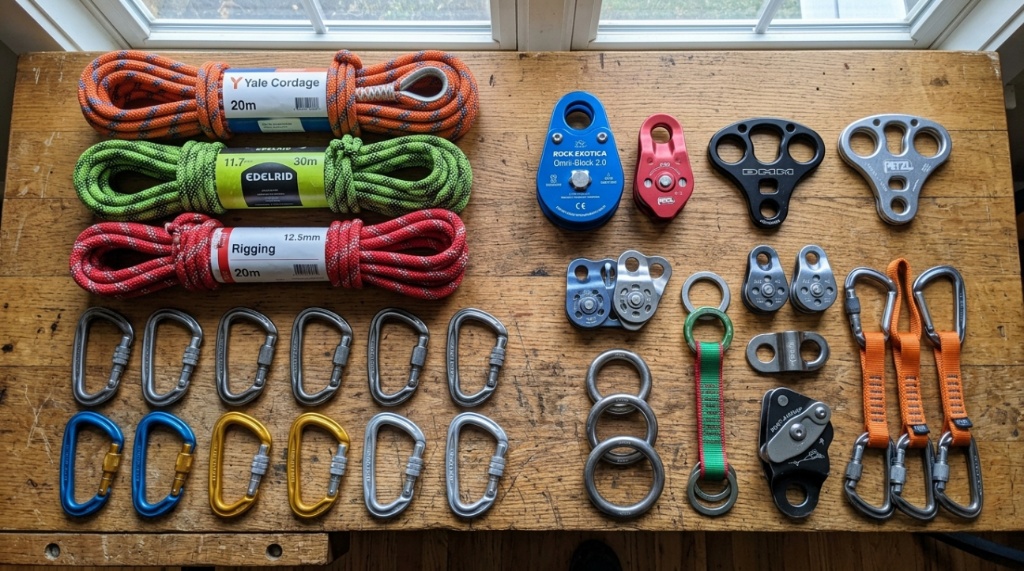
Yes, but only if you completely change your mindset. Climbing ropes are built to handle repeated bending over branches and friction hitches. Rigging ropes are built for shock loading. An affordable kit for climbing should not be used to drop heavy logs unless you specifically buy a separate rigging line. The two are not interchangeable for safety reasons.
Potential Dangers of Cross-Usage
Climbing rope sheaths are softer to grip well. When used for rigging, that soft sheath burns through quickly on sharp edges, weakening the rope without visible damage. Conversely, rigging ropes are too stiff for a friction hitch, causing a slippery descent and potentially dropping you from the canopy.
Setting Up a Dedicated Rigging System
If you need to lift loads, invest in a separate 12.5mm line with a break strength of 12,000+ lbs. You can still use the same carabiner and pulley, but never use the climbing portion of the kit for heavy rigging. Keep a separate rigid bag for this gear.
Maintenance Tips to Extend Kit Lifespan
After every climb, rinse the rope in cold water and hang it in a cool, dark place. Never expose it to battery acid or car trunks (heat). A monthly wash with a mild detergent (like Tech Wash) removes dirt that acts like sandpaper inside the sheath. This simple habit can extend rope life by twice longer than expected.
How Do You Compare Weight and Packability?
An affordable kit should not weigh more than 5 pounds total for the rope and slings. If you’re dragging a giant bag up a hill, you’ll be exhausted before you even climb. Lightweight ropes (under 6 lbs per 100 feet) are worth paying a bit extra for because they reduce fatigue and allow you to tie tighter hitches.
Signs of “Heavy Cheap” Rope in Budget Kits
Check the rope’s specification for grams per meter. Anything over 100 g/m is too heavy for practical climbing. Some cheap ropes use a thicker cover to mask a thin core, which makes them heavy and bulky. You want a balance of a dense core and a thin, tight sheath.
Determining the Right Length for Your Needs
If you’re working on residential trees under 50 feet, buy a 120-foot rope. Anything longer is just unnecessary weight. A 150-foot rope is nearly 2 pounds heavier, which you’ll feel on your harness. Only buy 200 feet if you’re climbing pines over 80 feet.
Carrying Solutions in the Kit
Some kits come with a throwing bag or a rope tarp. A rope tarp is essential—it keeps the rope off the dirt and needles. If the kit doesn’t have one, factor in the $35 cost for a simple piece of canvas with a drawstring. You’ll save time on cleanup.
Which Brand Offers the Best Value for Money?
Teufelberger and Yale are the industry gold standards, but they command high prices. For true affordability, brands like Cortland and All Gear offer decent quality. But don’t get stuck on brand names—instead, compare the specific model’s strand count and core type. A lesser-known brand with a 16-strand double-braid is often better than a famous brand’s 12-strand hollow rope.
Reading Spec Sheets Like a Professional
Look for three numbers: tensile strength, elongation, and sheath percentage. The sheath percentage tells you how much of the rope’s weight is outer fibers. A good climbing rope has about 60% sheath. If it’s over 75%, the core is too thin, and the rope will cinch down under load,Before evaluating specific brand bundles or multi-piece packages, ensuring you know how to safe and affordable climbing rope is vital for protecting your safety while keeping your gear expenses low.
Finding Reviews That Aren’t Paid or Sponsored
Search for reviews on arborist-specific forums like TreeBuzz or Reddit’s r/arborists. Users there often post long-term wear reports after 6 months of use, which is far more reliable than a one-time unboxing video. Check for photos of glazing and fuzz build-up.
Where to Buy Without Paying Full Retail
Sometimes you can find open-box deals at overstock supply stores or arborist conferences. Many suppliers offer 10% discounts for ISA members. Buying a kit during seasonal sales (winter months) can save up to 25% compared to peak spring prices. Always compare shipping costs, as rope is heavy to ship.
When Should You Replace Rope Components from a Budget Kit?
Even the best budget kit wears out quickly. Replace the rope if you feel a sudden “soft spot” or if the sheath becomes so fuzzy that it looks like it has cotton candy. At that point, the core fibers are also degrading even if you can’t see it. Do not wait for visible core breakage—that is a death wish.
Visual Cues for Immediate Replacement
Look for shiny spots (glazing) that harden the rope and reduce its grip. Also, check the line in increments of 10 feet for any discoloration, cuts, or broken strands. A broken strand on the sheath means a 20% loss in strength, so retire the entire rope, not just the damaged section.
The “Hard Point” Test for Hitch Cords
Take the hitch cord and fold it in half. If it resists bending and springs back, it’s still good. If it stays folded, the internal core has collapsed. Since hitches are smaller, they wear out much faster than the main line—often three times sooner. Budget for replacing it twice a year.
Keeping a Replacement Schedule
Manufacturers recommend retiring climbing lines after 3 years of use, but in high-abrasion environments, 18 months is safer. Create a simple chalk mark on the rope’s end to note purchase date. When you see that mark, remind yourself that your gear is only as safe as its age and condition.
Frequently Asked Questions
Can I use a tree care rope kit for rock climbing?
No. Arborist ropes are designed for static loading and high abrasion resistance, but they lack the dynamic elasticity required to safely arrest a fall in rock climbing. Using an arborist rope for rock climbing transfers the force impact to your body, which can cause severe back injuries. Always use UIAA-rated dynamic ropes for that activity.
What is the difference between a $150 kit and a $350 kit?
The main differences are rope construction (12-strand vs. 16-strand), carabiner gate action, and the inclusion of a pulley. A $150 kit is often a 100-foot rope with a basic prusik loop and a standard locking carabiner, while a $350 kit includes a smoother 150-foot rope with dedicated eye-to-eye sling and a lightweight HMS carabiner.
How often should I inspect my climbing kit?
Perform a quick hand inspection before every climb, checking for cuts and glazing. Do a more thorough check once a month by bending the rope and examining the core through the sheath. Mark your rope with the date of first use to track age versus actual climbing days.
Can I replace the rope in the kit with any 11.7mm rope?
Yes, as long as the new rope is also a low-stretch double-braid. Ensure the diameter is within 1mm of the rest of the hardware to avoid slipping. If you switch to a slightly larger rope, you’ll need a larger hitch cord.
Is a 12-strand rope acceptable for beginner climbing?
A 12-strand rope is acceptable if it has a tight braid, but it tends to be more slippery and harder to tie hitches with than a 16-strand. For beginners, a 16-strand double-braid at 11.7mm diameter is the most forgiving and reliable choice. It’s worth the extra $30–40.
Do I need a separate lanyard set?
Yes, if the kit doesn’t include a lanyard—a short, adjustable rope connecting your harness to the tree for two-point support. It’s critical for moving around the crown safely. Budget at least an extra $50 for a basic flipping line and adjuster.
Can I use ascenders on an affordable arborist rope?
Yes, mechanical ascenders with cams work on 11.5mm to 13mm ropes. However, ensure the ascender width is compatible with your rope sheath’s diameter. A cheap rope with a soft sheath will be chewed up by metal ascenders, so stick to cam-driven ascenders designed for arborist lines.
Final Verdict: Balancing Budget and Safety
The best affordable kit is one that lets you climb without feeling like you’re hanging your life on a rubber band. Focus on rope density, carabiner size, and the quality of the eye slings. Don’t compromise on the climbing carabiner that’s your connection point to the entire world. If you have to spend a little extra on a separate HMS carabiner, do it. The rest of the components like a rope tarp or extra slings can be purchased later after you’ve tested the system. Remember, an affordable kit is not a life-long kit; it’s your first step to understanding what your climbing style truly needs.
Always ask your local climbing store if they allow you to feel the rope before buying. The “hand feel” is a crucial signal that a spec sheet simply cannot convey. The more premium your trust in the gear, the more confident you’ll be when you walk up to a 100-year-old oak with your new kit.
