
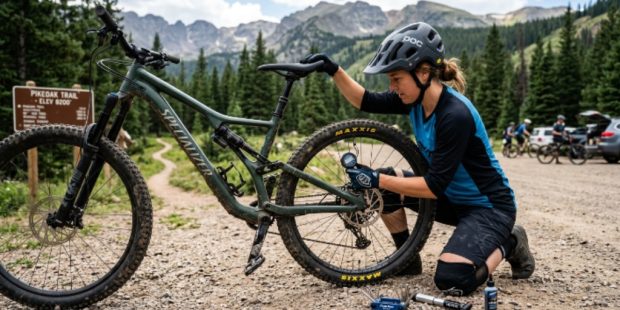
The best way to maintain a mountain bike is to inspect it before every trail ride and clean it afterward. Check tire pressure, brakes, wheels, drivetrain, suspension, cockpit, and frame before riding. Afterward, remove dirt, dry the bike, inspect damage, and lubricate the chain when needed. This simple routine catches small problems before they become expensive failures.
Mountain biking places far more stress on a bicycle than ordinary pavement riding. Rocks, roots, mud, water, steep descents, and repeated impacts can loosen or damage components. In 2024, 1,103 bicyclists died in traffic crashes across the United States. NHTSA also reports that bicyclist deaths reached their highest levels from July through October.
Build a Two Stage Maintenance Habit
A reliable maintenance routine works best when you divide it into two moments. The first inspection happens before the trail, while the second happens immediately after the ride. Together, these checks protect safety, performance, and component life.
Before riding, focus on anything that could cause an immediate failure. After riding, focus on dirt, moisture, wear, damage, and changes you noticed during the trail.
This approach also saves time because you avoid treating every maintenance task as a major workshop project. Most post ride checks take only a few minutes when you perform them consistently.
Before Every Trail Ride: Start With the Safety Check
Check Tire Pressure
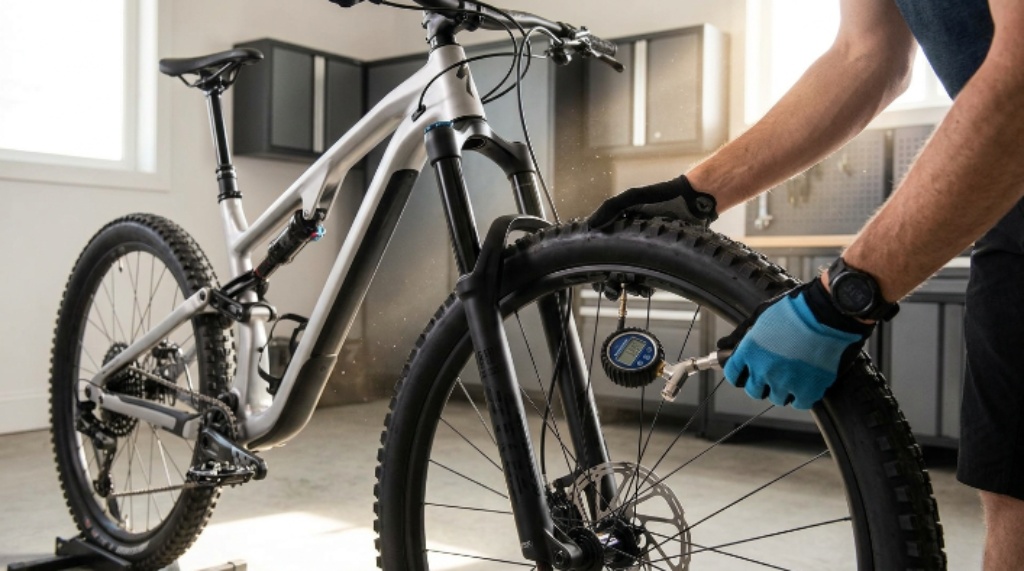
Start with both tires because pressure strongly affects traction and handling. Use a reliable gauge instead of judging pressure by squeezing the tire with your fingers.
Mountain bike tire pressure depends on tire width, casing, rider weight, terrain, wheel size, and riding style. Tubeless setups can usually run different pressures than tubes, so follow your tire and wheel manufacturer recommendations.
Next, inspect each tire for cuts, embedded stones, exposed casing, sidewall damage, or unusual bulges. Remove sharp debris carefully before it reaches deeper into the rubber.
Finally, spin each wheel and watch the tire closely. Stop riding if you notice serious damage, an unstable tire bead, or a wheel that no longer runs safely.
Test Both Brakes
Squeeze the front and rear brake levers separately. Each lever should feel firm and should provide predictable braking without touching the handlebar.
Then inspect the brake pads for excessive wear and contamination. Replace severely worn pads rather than trying to extend their service life.
For hydraulic brakes, look around the calipers and hoses for signs of fluid leakage. For mechanical systems, inspect cables and housing for fraying, kinks, corrosion, or loose connections.
Also spin each wheel and listen for persistent brake rub. A slight sound can have several causes, but sudden rubbing deserves attention before a demanding descent.
Inspect Wheels and Axles
Grab each wheel and gently push it sideways. Any noticeable play can indicate a loose axle, hub issue, or another problem requiring inspection.
Check that through axles sit correctly and tighten according to the bicycle manufacturer’s specification. If your bike uses quick releases, confirm that each lever closes securely.
Spin both wheels and watch for major side to side or vertical movement. A small amount of movement may indicate a wheel needing truing, while severe movement can affect control.
Examine the Drivetrain
Pedal the bike backward and observe the chain. Look for heavy grime, rust, damaged links, or unusual movement.
Shift through several gears while the bike remains stationary. The derailleur should move the chain cleanly without excessive hesitation or grinding.
Check the rear derailleur and derailleur hanger for obvious damage. A bent hanger can cause poor shifting and may become more problematic during a rough ride.
A clean, properly lubricated chain also reduces drivetrain wear. Park Tool notes that regular chain cleaning and lubrication can improve shifting and extend drivetrain component life.
Give the Suspension a Dedicated Inspection
Check the Fork
Suspension components deserve attention because they work continuously on rough trails. Wipe dirt from the fork’s upper tubes and inspect those surfaces for scratches.
Check the wiper seals for packed dirt or unusual contamination. Also confirm that the fork has the correct air pressure for your setup.
SRAM’s current suspension guidance recommends cleaning the upper tubes and wiper seals every ride. It also calls for checking air pressure and inspecting the upper tubes for scratches.
Do not ignore a fork that suddenly feels different. Changes in travel, rebound, compression, or noise can signal a maintenance issue.
Check the Rear Shock
Inspect the shock body and surrounding areas before riding. Look for dirt buildup, unusual oil residue, damaged hardware, or signs of looseness.
Confirm that your shock pressure and settings still match your normal setup. Significant changes can affect traction, braking control, and how the bike handles impacts.
Never assume suspension components need attention only during annual servicing. Follow the service schedule specified for your particular fork and shock.
Inspect the Frame and Contact Points
Run your eyes over the entire frame before every serious trail session. Pay particular attention to the head tube, bottom bracket area, chainstays, seatstays, and suspension mounts.
Look for cracks, deep scratches, dents, or fresh marks that were not present previously. Carbon frames deserve especially careful visual inspection after hard impacts.
Next, check the handlebar and stem. Make sure nothing feels loose, twisted, cracked, or unusually positioned.
Check the saddle and seatpost as well. A loose saddle can distract you on technical terrain and may indicate a loose clamp or seatpost mechanism.
Check the Cockpit and Controls
Your handlebars control nearly every movement on a mountain bike. Therefore, any cockpit looseness deserves immediate attention.
Hold the front wheel between your legs and gently test the handlebar. It should not rotate independently from the front wheel.
Operate the shifter, dropper post lever, and brake levers. Each control should move smoothly and return correctly.
For a dropper post, confirm full extension and proper operation. If the post sinks under your weight, investigate the problem before riding demanding terrain.
Take a Short Test Ride
A stationary inspection cannot reveal every problem. Therefore, ride slowly for a minute before entering technical terrain.
Test both brakes and shift through several gears. Listen for new clicks, grinding, rattling, knocking, or unusual suspension noises.
Pay attention to steering feel as well. A bike that suddenly feels vague, stiff, crooked, or unstable needs inspection.
This short test ride acts as the final filter between your maintenance stand and the trail.
After Every Trail Ride: Remove the Evidence
Trail dirt tells you where your bike needs attention. Mud can hide cracks, loose parts, worn components, and contaminated drivetrain surfaces.
Start by removing large chunks of mud and vegetation. Do this before the dirt dries and becomes harder to remove.
If you use a hose, keep water pressure low and avoid blasting bearings directly. Park Tool specifically recommends low pressure when rinsing a bicycle.
After washing, dry the bike thoroughly. Hand drying also gives you another opportunity to inspect components for damage.
Clean the Drivetrain Correctly
The drivetrain deserves special attention after muddy or gritty rides. Dirt mixed with lubricant can form an abrasive paste that accelerates component wear.
Wipe the chain with a clean rag after removing surface contamination. For heavier buildup, use a bicycle suitable degreaser and a dedicated chain cleaning method.
Clean the chainrings, cassette, derailleur cage, and pulley wheels as well. These areas collect trail debris that can interfere with shifting.
Once the chain dries, apply an appropriate bicycle chain lubricant. Then wipe away excess lubricant because excessive oil attracts more dirt.
Match Lubrication to Riding Conditions
Wet trails usually require a lubricant suited to wet conditions. Dry and dusty trails often benefit from a formulation designed to reduce dirt accumulation.
Do not simply add fresh lubricant over a heavily contaminated chain. Clean the chain first when dirt has accumulated significantly.
Also avoid spraying lubricant around brake rotors or pads. Even small amounts of contamination can seriously reduce braking performance.
Inspect the Tires After Riding
Post ride tire inspection can reveal problems that pressure checks cannot. Look for cuts, punctures, embedded thorns, sidewall damage, and damaged tread.
Tubeless riders should also check whether sealant remains effective. A tire that repeatedly loses pressure may need closer inspection.
If you experienced a hard rim impact, inspect the tire bead and wheel carefully. A slow leak after an impact deserves attention before the next ride.
Do not automatically replace a tire because of superficial cosmetic marks. Instead, assess whether the casing, sidewall, tread, or bead has suffered meaningful damage.
Inspect Brakes After Muddy Rides
Mud can collect around brake calipers and pads. Clean the affected areas without contaminating the braking surfaces.
Check the rotors for obvious damage or contamination. Also look for unusual scoring, discoloration, or persistent noise.
If braking performance changed during the ride, record what happened. A brake that felt normal before the trail but weak afterward needs investigation.
Remember that cleaning cannot repair worn pads or damaged hydraulic components. Replace or service defective parts before returning to difficult terrain.
Check the Suspension After the Trail
Wipe the fork and shock clean after every dirty ride. Pay particular attention to the upper tubes and seal areas.
Inspect for scratches, dents, unusual oil residue, or accumulated grit. These small observations can help you identify developing suspension problems.
Cycle the suspension through its normal movement if appropriate for your setup. Listen for new sounds and notice whether the action feels consistent.
Do not disassemble suspension components casually. Internal service requires the correct tools, procedures, and manufacturer specific specifications.
Use Your Ears as a Maintenance Tool
Experienced riders often notice mechanical problems through sound before they see them. Therefore, treat new noises as useful information rather than background noise.
A new clicking sound can come from several areas. Check the pedals, crank, chain, cassette, derailleur, wheels, and suspension before assuming the source.
A creak under load can also point toward loose or worn components. Finding the source early can prevent a small issue from becoming a major repair.
Keep a simple mental note of unusual sounds after each ride. Patterns become easier to identify when you compare one ride with another.
Know What Needs Immediate Attention
Not every maintenance issue requires the same response. A sensible system helps you decide whether to ride, repair, or visit a professional.
Stop riding and investigate these warning signs:
- Cracked frame or visibly damaged structural component
- Loose handlebar, stem, crank, axle, or suspension hardware
- Brake lever pulling unusually close to the handlebar
- Severe tire or sidewall damage
- Major wheel movement or damaged rim
- Hydraulic fluid leakage
- Sudden suspension failure
- Steering that feels loose or unstable
- Drivetrain damage that prevents reliable shifting
Small cosmetic scratches usually require observation rather than immediate replacement. However, structural damage should always receive serious attention.
Create a Simple Maintenance Schedule
Daily checks handle immediate safety concerns. However, mountain bikes also need deeper maintenance at longer intervals.
Use this practical schedule:
- Every ride: Check tires, brakes, wheels, drivetrain, suspension, cockpit, and frame.
- After muddy rides: Wash, dry, inspect, and lubricate the drivetrain.
- Regularly: Check chain wear, brake pad wear, tire condition, and fastener security.
- By service hours: Follow the manufacturer’s suspension service schedule.
- Before major trips: Perform a complete inspection or professional tune if necessary.
Suspension service intervals vary by component and manufacturer. For example, SRAM lists specific service intervals based on suspension model and operating hours.
Therefore, do not use a generic service interval as a replacement for your component manufacturer’s instructions.
Build a Trail Ride Maintenance Kit
A small trail kit can solve common problems before they end your ride. Carry tools that match your bicycle instead of copying another rider’s setup.
A useful kit can include:
- Mini pump or compatible inflation device
- Tire levers
- Tubeless plug kit if applicable
- Spare tube
- Multitool with appropriate hex keys
- Quick chain connector
- Small chain tool
- Tire pressure gauge
- Basic first aid supplies
- Emergency contact information
Test your tools before a long ride. A repair kit only helps when you know how to use every item.
Clean Without Overdoing It
A mountain bike needs regular cleaning, but aggressive cleaning can create new problems. High pressure water can force contamination toward bearings and other sensitive areas.
Use brushes, clean water, mild bicycle cleaning products, and controlled rinsing. Park Tool recommends drying the bike after washing and avoiding direct compressed air against bearings.
After cleaning, wipe the bike manually where possible. This process also helps you discover loose bolts, damaged cables, worn seals, and fresh impact marks.
The goal is not to make every component look showroom new. The goal is to keep the bike clean enough for accurate inspection and reliable operation.
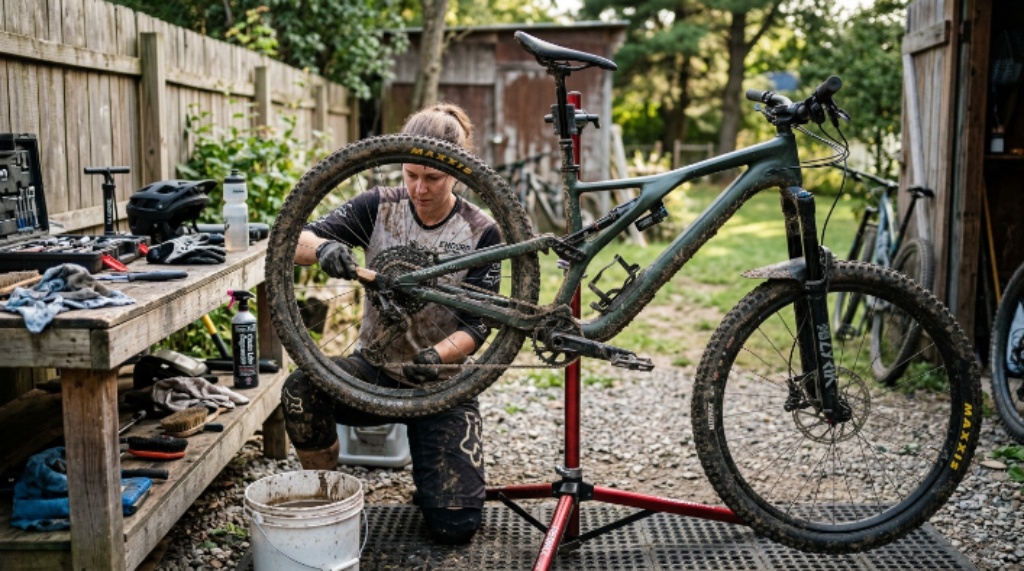
The 10 Minute Pre and Post Ride Routine
If time feels limited, use a repeatable checklist instead of skipping maintenance. A consistent routine beats an occasional deep clean.
Before riding, spend a few minutes checking:
- Tire pressure and tire condition
- Brake lever feel and pad condition
- Wheel security and wheel alignment
- Chain condition and shifting
- Fork and shock condition
- Handlebar, stem, saddle, and dropper
- Frame and suspension hardware
After riding, spend another few minutes checking:
- Mud and debris buildup
- Tire cuts and punctures
- Brake condition
- New noises or movement
- Suspension surfaces
- Chain cleanliness
- Frame damage
- Loose components
This routine turns maintenance into part of riding rather than an unpleasant chore. More importantly, it helps you notice changes before they become failures.
Final Thoughts
Mountain bike maintenance works best when you treat it as a riding habit, not an occasional repair session. Check safety critical components before every trail, then clean and inspect the bike after every ride. Most importantly, investigate new noises, movement, damage, or performance changes before your next demanding trail.
Start your next ride with a quick inspection and finish it with a proper cleanup. Keep your tools ready, follow your component service schedules, and record recurring problems. A few disciplined minutes can protect your bike, improve trail performance, and help you ride with greater confidence.
FAQs
How often should I maintain my mountain bike?
You should perform basic safety checks before every ride and clean and inspect the bike after demanding or dirty rides.
Should I clean my mountain bike after every ride?
Yes, especially after muddy, wet, sandy, or dusty rides because contamination can accelerate wear.
What should I check first before mountain biking?
Start with tire pressure, brakes, wheel security, drivetrain condition, suspension, and cockpit tightness.
How often should I lubricate a mountain bike chain?
Lubricate the chain when it becomes dry or noisy, and always after thorough cleaning and drying.
When should I take my mountain bike to a professional?
Visit a qualified bike mechanic when you find structural damage, hydraulic problems, suspension issues, or repairs beyond your tools.
