
You have the reflexes. You know the maps. You grind the aim trainers. But something still feels off. You call out enemy positions, but you can’t quite pin down their footsteps. You react a split-second too late. The problem isn’t your skill—it’s your audio. Many players believe you need to spend hundreds on a top-tier headset to get an edge. That simply isn’t true. You can dominate matches budget audio by making smart, informed choices about sound settings and hardware. This guide will show you exactly how to turn your limited budget into a real competitive advantage, covering everything from in-game audio profiles to specific product recommendations that won’t break the bank.
What Makes Budget Audio Viable for Competitive Gaming?
Understanding the Core Components of Affordable Headsets
Budget audio isn’t about cheap plastic and muddy sound anymore. Modern affordable headsets use dynamic drivers that deliver punchy mids and highs, often with a slight bass boost that helps footsteps pop. The key is knowing which components matter most: the driver size (40mm to 50mm is ideal), the frequency response range (look for 20Hz–20kHz at minimum), and the microphone quality. You don’t need a $300 DAC to get positional audio clarity; you just need a headset with a balanced sound signature and a decent soundstage.
Why Price Doesn’t Always Equal Performance
High-end headsets often include features like wireless connectivity, active noise cancellation, or premium padding that inflate the price tag. For competitive gaming, most of those extras are unnecessary. A wired budget headset can deliver lower latency and more consistent sound than its expensive wireless counterpart. When you dominate matches budget audio, you are prioritizing sound imaging and comfort over flashy bells and whistles. Many budget models now use the same 50mm drivers found in mid-range headsets, just with simpler housings.
Real-World Examples of Budget Performers
Headsets like the HyperX Cloud Stinger Core, Razer BlackShark V2 X, and Logitech G432 have proven that you can get excellent directional audio for under $50. These models consistently rank for their clear treble response, which makes enemy footsteps audible during hectic firefights. Users report being able to pinpoint directionality within a few degrees, which is often enough to pre-fire corners or rotate before an enemy peaks.
How Can You Optimize In-Game Audio Settings for Maximum Awareness?
Adjusting EQ Profiles on a Budget
Most budget headsets come with a flat or slightly bass-heavy default EQ. You can fix this using Windows Sonic, Dolby Atmos (free trial), or third-party tools like Equalizer APO. For competitive shooters like Valorant or CS2, boost the 2kHz to 4kHz range to make footsteps and reload sounds stand out. Cut the sub-bass (below 60Hz) to reduce ambient noise floor rumble. This simple tuning transforms a $30 headset into a precision instrument.
Disabling Audio Enhancements for Clearer Sound
Many budget headsets suffer from “virtual surround sound” features that actually muddy the audio. Turn off any simulated 7.1 or spatial audio in your headset software. Instead, rely on stereo mode with strict left-right separation. In games like Apex Legends or Warzone, disable “Loudness Equalization” in Windows Sound settings. This prevents compression that squashes quiet footsteps and loud gunshots together, making it harder to distinguish enemy proximity.
Setting Optimal Volume and Dynamic Range
Set your game volume to around 80% and use your system volume to fine-tune. This avoids clipping distortion common in budget drivers at max volume. Enable “Dynamic Range” or “Audio Compression” if your game offers it, as this can boost quiet sounds without blowing out the loud ones. For example, in Fortnite, setting audio to “Night Mode” reduces the gap between quiet footsteps and loud explosions, making it easier to hear enemies sneaking up, If you are interested in exploring how blockchain technology intersects with sound, you can also check out how NFTs are unlocking exclusive access to social audio content.
Which Budget Headsets Deliver the Best Competitive Edge?
Top Picks Under $50 for Footstep Clarity
The HyperX Cloud Stinger Core is widely regarded as the king of budget gaming audio. Its 40mm drivers produce crisp highs and a surprisingly wide soundstage. The Razer BlackShark V2 X offers a lighter design and a removable mic that reduces background noise, making it ideal for team comms. Both models are wired, meaning zero latency and consistent audio quality across sessions. For under $30, the Logitech G332 provides a solid alternative with decent bass representation.
Wired vs. Wireless: Which Is Better for Competitive Play?
For competitive gaming, wired is almost always better. Budget wireless headsets introduce latency—even a 20ms delay can cause you to react after an enemy already moves. Wired connections also guarantee full frequency response without compression. If you absolutely need wireless, look for models with a low-latency USB dongle rather than Bluetooth. The Corsair HS55 Wireless Core, for instance, offers a balanced signature at a reasonable price, but still falls behind wired alternatives in raw positional accuracy.
Where to Find Verified Deals and Reliable Models
When shopping, focus on retailers with easy return policies and verified reviews. Avoid random unknown brands; stick with established names like HyperX, Razer, Logitech, and SteelSeries. You can often find last-generation models at steep discounts. For instance, you can dominate matches budget audio by checking local or online inventories for open-box or refurbished units from reputable sellers. Always read recent reviews to ensure the headset hasn’t been downgraded in a newer revision.
Why Do Soundstage and Imaging Matter More Than Bass?
Defining Soundstage and Imaging for Competitive Gaming
Soundstage refers to the perceived width of the audio environment—how far left and right sounds seem to come from. Imaging is the precision of placing a sound source within that space. For fragging, imaging is king. You need to know if that footstep is at 2 o’clock or 3 o’clock, not just that it’s “to the right.” Budget headsets with strong imaging often use angled drivers or slightly closed-back designs to enhance directional cues.
How to Test Your Headset’s Imaging Abilities
Use free audio test files or the in-game training modes. In Valorant, go to the range and listen to the radio directions. In CS2, use the radar and sound to predict enemy positions. A good budget headset should let you localize a sound to within 10–15 degrees of accuracy without needing to spin your character. If you frequently misjudge distances or heights (vertical height), your imaging is likely weak.
The Pitfall of Over-Engineered Bass on a Budget
Many manufacturers boost bass to make headsets sound “powerful” on shelves. Unfortunately, excessive bass masks the mid-range frequencies where footsteps, gun reloads, and enemy callouts live. Avoid headsets marketed specifically as “bass-heavy.” Instead, look for terms like “balanced,” “reference,” or “neutral.” The SteelSeries Arctis 1, for example, offers a nearly flat response curve that makes it a top choice for competitive play on a budget.
How Can You Improve Audio Quality Without Buying New Hardware?
Using Software and System Tweaks
Windows has built-in audio enhancements that can drastically improve budget headsets. Enable “Disable all sound effects” in the Advanced tab first, then turn on “Loudness Equalization” only if footsteps feel too quiet. For most shooters, a third-party EQ like Peace Equalizer APO is better. Create a profile that cuts the 250Hz–500Hz range by 3dB and boosts the 2kHz–4kHz range by 4dB. This simple adjustment can make a $25 headset feel like a $100 one.
Optimizing Your Game’s Audio Mix
Every competitive shooter has an audio mix preset. In Apex Legends, choose “Headphones” over “TV” or “Stereo.” In Valorant, set the audio to “HRTF” (head-related transfer function) if available. In Warzone, use “Boost Low” for footsteps or “Boost High” for long-range gunfights. These presets are specifically designed to work with budget headphones and can dramatically change how you perceive threats.
Fixing Common Physical Setup Mistakes
Most budget headsets suffer from poor fit, which causes sound leakage and muffled bass. Ensure the ear cups create a full seal around your ears. If they’re too loose, add a thin layer of foam or wear a beanie under them. Also, check that your device’s audio port is clean and that you’re not using a poor-quality extension cable. A simple USB sound card (like the Syba Sonic) can clean up audio noise on older motherboards for under $15.
Can a Budget Headset Handle Team Communication Effectively?
The Importance of a Decent Microphone
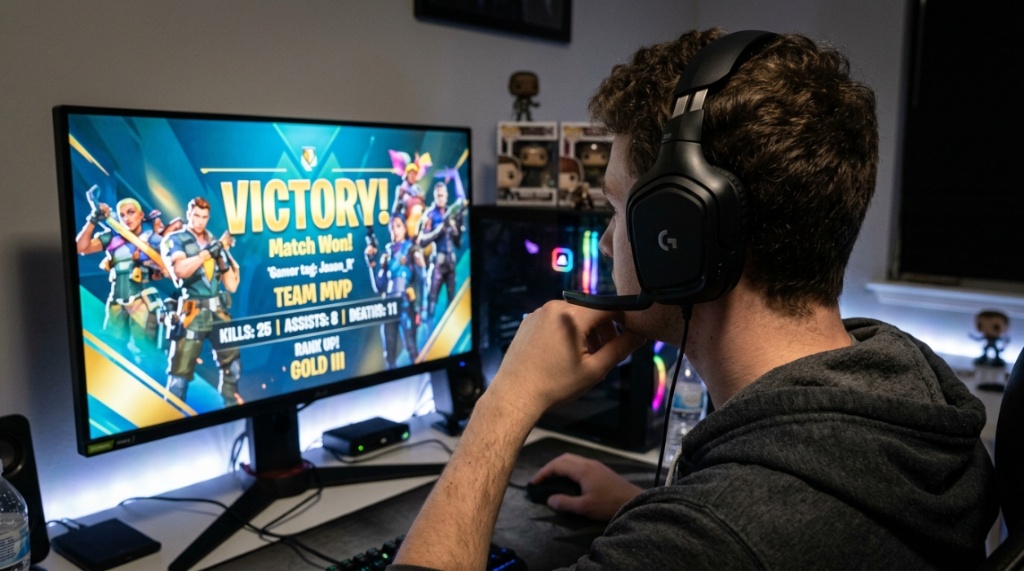
Yes, a budget headset can handle team comms, but you need to pay attention to the mic. Look for models with a noise-cancelling microphone that filters out keyboard clicks and background hum. The Razer BlackShark V2 X and the HyperX Cloud Stinger Core both feature good mic quality that doesn’t sound tinny or distant. Always test your mic in your chosen game’s voice chat before a ranked match.
Setting Up Microphone Levels for Clarity
In Windows, open Sound Settings and set your microphone volume to around 70% and increase the boost to +10dB. This prevents clipping while ensuring your voice is loud enough. Many budget headsets have a very sensitive mic, so reducing the gain slightly can actually make your voice clearer to teammates by avoiding distortion. Also, enable “Noise Suppression” and “Acoustic Echo Cancellation” in Discord or your game’s voice settings.
Tools to Improve Mic Quality on a Budget
If your headset’s mic sounds poor, try free software like Krisp (offers a free tier) or use Discord’s built-in noise suppression set to “High.” You can also mount a simple foam windscreen over the mic to reduce plosives. For less than $10, a cheap USB microphone standalone can be added, but the inconvenience of an extra device often outweighs the gains. Stick with an integrated mic that has positive reviews for voice chat.
How Do You Maintain Budget Audio Gear for Long-Term Performance?
Cleaning and Storage Best Practices
Budget headsets have plastic hinges and fabric ear cups that degrade faster than premium models. Store your headset on a stand or hang it off a hook—never leave it on a desk where cables can be snagged. Clean the ear pads weekly with a damp cloth to remove oils and sweat. After six months, consider replacing the ear pads with generic replacements ($5–$10 on Amazon) to restore comfort and sound seal.
Wiring and Connection Care
Frayed cables are the number one killer of budget headsets. Use a cable tie or a cable management clip to prevent kinks near the 3.5mm jack. Never wrap the cable tightly around the headset when storing. If you notice crackling sounds or volume drops, replace the 3.5mm cable (if detachable) or use a cheap USB to 3.5mm adapter to bypass a damaged port.
When to Upgrade vs. When to Repair
If your budget headset’s driver blows or the mic stops working, it’s usually cheaper to buy a new one than to repair it. However, if the cable is the only issue and the headset is detachable, a simple replacement cable costs around $10. Similarly, if the headband padding wears out, a generic foam wrap can extend the life by another year. Otherwise, aim to upgrade every 1–2 years to take advantage of better budget technology.
What Common Mistakes Do Players Make with Budget Audio?
Over-Reliance on Virtual Surround Sound
Many players enable virtual surround sound, thinking it gives a wider soundstage. In reality, it often introduces echo, phase issues, and a “swimming” effect that hurts directional cues. For competitive gaming, turn off virtual surround and use stereo mode. The human brain is already excellent at localizing sounds with just two ears; virtual processing usually gets in the way.
Ignoring In-Game Audio Mix Presets
Players often leave audio on default settings. In games like Rainbow Six Siege, the “Night Mode” mix reduces dynamic range, making quiet footsteps louder. In Overwatch, the “Headphone” mode adjusts HRTF for better vertical audio. Not using these presets with budget headsets is like playing with half your potential. Always check the audio settings when you first install a game.
Using Rear Audio Ports on a Desktop
Desktop rear audio jacks often have extra interference from the motherboard’s electrical noise, especially on budget PCs. For best results, use the front panel audio jack or, even better, a cheap USB DAC dongle. This provides a cleaner power source and better signal-to-noise ratio, which directly translates to clearer footsteps and fewer audio artifacts.
Frequently Asked Questions
Are budget gaming headsets good enough for esports?
Yes, many budget headsets are excellent for esports, especially if you optimize EQ and in-game settings. Models like the HyperX Cloud Stinger Core or Razer BlackShark V2 X offer competitive imaging and clear mids that help you hear footsteps and gunshots accurately. They are not inferior to high-end models; they simply lack non-essential features.
How much should I spend on a gaming headset for competitive play?
For competitive play, aim for $30 to $60. This price range offers the best balance of driver quality, microphone performance, and build durability. Spending over $100 often introduces features like wireless or ANC that add cost without improving in-game audio accuracy for footsteps.
Can I use a single-ear gaming headset for competitive gaming?
No, single-ear headsets (mono headsets) are not suitable for competitive gaming because they lack stereo separation needed for directional audio. You need a stereo headset that covers both ears to accurately pinpoint enemy positions. In-ear monitors (IEMs) can be a good alternative for under $30.
Does a higher impedance headset automatically sound better?
No, higher impedance (above 32 ohms) usually requires a dedicated amplifier to sound loud and clear. Most budget motherboards and consoles cannot drive high-impedance headsets properly, resulting in quiet or distorted audio. For budget setups, stick with headsets under 32 ohms impedance for best results.
How do I clean a budget gaming headset without damaging it?
Use a slightly damp microfiber cloth to wipe the headband and ear cups. Avoid submerging the headset or using harsh chemicals like alcohol, which can dry out the plastic and cause cracking. For fabric ear pads, gently dab with a cloth and let them air dry for 12 hours after each cleaning.
Should I use a microphone arm with a budget headset?
Not typically. A microphone arm is overkill for a budget headset’s integrated mic. If you need better voice quality, it’s more effective to upgrade the headset itself or use a free software noise gate. A separate mic arm is only worth it if you have a dedicated $100+ microphone.
What’s the easiest way to test if my budget headset has good imaging?
Open an audio test file with footsteps playing at different positions (left, center, right, behind). Listen without looking at the screen. If you can accurately identify the direction within 10–15 degrees consistently, the imaging is good. You can find free test files online or use in-game training modes.
