
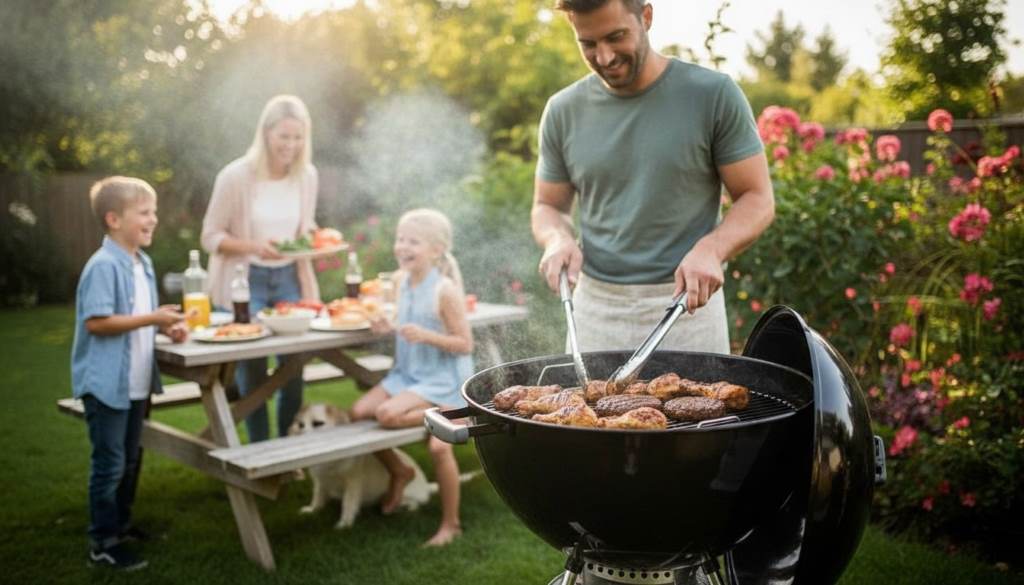
Picture this: friends gather in your backyard on a warm evening. The air fills with the rich, smoky aroma of grilling meat. Laughter mixes with the sizzle of steaks hitting hot grates. That magic often starts with charcoal grilling. If you want authentic flavor, try Charcoal Grill for Backyard BBQ with the classic Weber Original Kettle 22-Inch Grill. This iconic grill has helped home cooks create memorable meals for decades.
Moreover, charcoal delivers that deep, smoky taste gas grills often miss. According to the Hearth, Patio & Barbecue Association (HPBA), over 70% of U.S. households own a grill, and many choose charcoal for its superior flavor. Another HPBA survey shows millions grill year-round, proving backyard BBQ remains a favorite pastime.
In this guide, you learn everything to master the Weber Kettle. From setup to advanced techniques, these tips lead to BBQ success every time.
Why the Weber Original Kettle 22-Inch Grill Stands Out
The Weber Original Kettle earns its legendary status for good reasons. Its simple yet smart design features a porcelain-enameled bowl and lid that hold heat well and resist rust.
Additionally, the 22-inch cooking area fits plenty of food. You can grill for a small family or a larger group without trouble.
The One-Touch cleaning system makes ash removal easy. Sweep ashes into the catcher with a quick lever move.
However, the real strength lies in versatility. This grill handles direct high-heat searing and indirect low-and-slow cooking.
Many enthusiasts love it because it offers authentic charcoal taste at a solid value. Start here if you want smoky flavor without complex setups.
Unboxing and Assembly: Get Started Right
Open the box and lay out all parts. The Weber Kettle arrives mostly assembled, which saves time.
First, attach the legs to the bowl. Secure them with included bolts. Then, add the wheels for easy movement.
Next, install the ash catcher under the bottom vents. This catches debris and keeps your patio clean.
Place the cooking grate inside. It fits perfectly on the supports.
Finally, add the lid with its built-in thermometer. Assembly takes about 30 minutes with basic tools.
Follow the official Weber guide for exact steps. Proper setup ensures stability and safe use from day one.
After assembly, season the grates. Light a full load of charcoal and burn for 30 minutes with the lid on. This removes factory residues and prepares the surfaces.
Essential Accessories for Better Results
Build success with a few key tools. A chimney starter tops the list. It lights charcoal quickly and evenly without chemical fluids.
Moreover, get long-handled tongs and a spatula. They keep your hands safe from heat.
A good grill brush cleans grates effectively. Choose one with sturdy bristles.
Additionally, charcoal baskets help for indirect cooking. They hold coals on the sides for even heat zones.
Invest in a reliable meat thermometer. It ensures perfect doneness every time.
However, start simple. The grill works great with just basics.
These accessories improve control and make grilling more enjoyable.
Lighting the Charcoal: Safe and Effective Methods
Light charcoal properly for great results. Many prefer the chimney starter method.
Fill the chimney with briquettes or lump charcoal. Stuff newspaper or starter cubes in the bottom.
Then, light the paper. Coals glow red in 10-15 minutes.
Pour the hot coals into the grill once ready. Spread them for direct heat or bank them for indirect.
Avoid lighter fluid when possible. It can leave chemical tastes on food.
However, if you use fluid, apply it to cold coals only. Wait until flames die and coals ash over.
Always light in an open area. Never add fluid to burning coals.
Good airflow helps coals light faster. Open all vents at the start.
Practice this a few times. Soon, you get perfect fires every session.
Mastering Temperature Control on Your Weber Kettle
Control temperature like a pro. The Kettle excels here with its vent system.
Bottom vents bring in oxygen. Top vents release heat and smoke.
For high heat, open all vents fully. This reaches 500°F or more for searing.
However, for low-and-slow, close bottom vents halfway. Adjust the top vent slightly.
Monitor the lid thermometer. It shows accurate readings.
Add unlit coals during long cooks using the Minion method. They light gradually for steady heat.
Wind affects temperature. Shield the grill or adjust vents as needed.
Additionally, preheat 10-15 minutes. This stabilizes heat before food goes on.
Master vents and you control any temperature from 225°F to searing hot.
Direct vs. Indirect Grilling: Choose the Right Method
Understand heat zones for best results. Direct grilling places food over coals.
This method sears steaks and burgers fast. It creates crisp crusts and grill marks.
Spread coals evenly across the bottom for direct heat.
However, indirect grilling keeps food away from coals. Bank coals on sides with a drip pan in the middle.
This acts like an oven. Perfect for whole chickens, ribs, or roasts.
Moreover, combine both. Sear directly first, then move to indirect to finish.
The two-zone setup offers flexibility. One side hot, one side cooler.
Experiment with arrangements. Soon, you cook anything perfectly.
Direct gives bold char. Indirect ensures even cooking without burning.
Related:
Goat Cheese Recipes with Olive Oil Flavor Layering
STK Miami Beach: Menu, Location & Dining Experience
Grilling Techniques for Perfect Backyard BBQ
Apply proven techniques for success. Preheat fully every time.
Oil the grates to prevent sticking. Use high-smoke-point oils.
Moreover, let meat reach room temperature. It cooks more evenly.
Flip only once for steaks. This builds better crust.
However, move food often for burgers or vegetables. Prevent burning.
Rest meat after grilling. Juices redistribute for better flavor.
Baste during the last minutes. Add sauce layers without early burning.
Additionally, use wood chunks for extra smoke. Soak them first for steady release.
Close the lid for most cooks. It traps heat and smoke.
These habits turn good grills into great ones.
Mouthwatering Recipes to Try on Your Weber Kettle
Start with classics. Grill perfect burgers.
Use 80/20 ground beef. Form loose patties with a thumb dimple.
Season generously. Sear direct over high heat 3-4 minutes per side.
Then, add cheese and toast buns.
However, try smoked ribs next. Use indirect at 225-250°F.
Apply dry rub overnight. Smoke 3 hours, wrap 2 hours, sauce 1 hour.
Moreover, grill whole chicken. Spatchcock it for even cooking.
Rub under skin. Cook indirect until 165°F in the breast.
Additionally, smoke brisket low and slow. Trim fat cap.
Maintain 225°F for hours. Wrap when bark sets.
Rest well before slicing.
Vegetables shine too. Toss in oil and grill direct.
Corn in husk indirect adds smoky sweetness.
These recipes show the Kettle’s range. Build confidence with each cook.
Cleaning and Maintenance for Long-Lasting Performance
Keep your grill in top shape. Clean after every use.
Brush hot grates first. Food residue comes off easily.
Then, empty the ash catcher. Cool ashes go in a metal can.
However, deep clean monthly. Remove grates and scrub the bowl.
Use mild soap and a plastic scraper. Avoid harsh chemicals.
Moreover, check for rust spots. Touch up with high-heat paint if needed.
Store with a cover. Protect from weather.
Additionally, oil grates before storage. Prevent rust buildup.
Inspect vents and legs regularly. Tighten loose parts.
Proper care makes your Weber last decades.
Many owners pass them down generations.
Essential Safety Tips for Worry-Free Grilling
Safety comes first always. Grill outdoors only in open spaces.
Keep away from structures. Allow 10 feet clearance.
Moreover, supervise children and pets. Set a three-foot safe zone.
Use long tools. Protect hands from burns.
However, never leave lit grills unattended. Fires can flare quickly.
Have a fire extinguisher nearby. Know how to use it.
Additionally, wear closed shoes. Avoid loose clothing.
Cool ashes fully before disposal. Hot coals cause fires.
Follow these rules. Enjoy safe, fun grilling sessions.
Troubleshooting Common Weber Kettle Issues
Face problems sometimes. Uneven heat often comes from poor coal arrangement.
Bank coals better or use baskets.
However, flare-ups happen with fatty foods. Move meat to indirect quickly.
Low temperature? Check vents and add more coals.
Moreover, food sticks? Clean and oil grates well.
Smoke too much? Adjust vents for better airflow.
Lid thermometer off? Calibrate in boiling water.
These fixes solve most issues fast.
Practice builds intuition.
Conclusion
The Weber Original Kettle 22-Inch Grill opens a world of flavorful backyard BBQ. You now know assembly, lighting, temperature control, techniques, and maintenance.
Start simple. Build skills with each cook. Soon, you host legendary gatherings.
Moreover, charcoal delivers unmatched taste. Embrace the process and enjoy the rewards.
Grab your Weber Kettle today. Fire up the coals and create memories around great food.
Your backyard BBQ success starts now.
FAQs
How long should I preheat the Weber Kettle?
Preheat 10-15 minutes with the lid on. Coals ash over and the thermometer reads your target temperature. This ensures even cooking from the start.
What type of charcoal works best?
Kingsford briquettes offer consistency. Lump charcoal burns hotter and cleaner. Avoid cheap brands with fillers. Many prefer a mix for balance.
Can I smoke on the 22-inch Kettle?
Yes. Use indirect setup with wood chunks. Maintain 225-250°F for hours. The Kettle smokes ribs, brisket, and more effectively.
How do I achieve perfect grill marks?
Preheat fully. Oil grates. Place food at 45-degree angles. Wait before flipping. Rotate 90 degrees halfway for crosshatch patterns.
Is lighter fluid safe to use?
Use sparingly if at all. It can impart off flavors. Chimney starters provide cleaner, better results every time.
References
- Weber Official Grills Website: https://www.weber.com/US/en/charcoal/original-kettle
- Hearth, Patio & Barbecue Association Industry Data: https://hpba.org/data
- Weber Charcoal Grill Maintenance Tips: https://www.weber.com/US/en/blog/tips-techniques/charcoal-grill-maintenance/weber-31174.html
- HPBA Grilling Trends 2024-2025: https://hpba.org/7-trends-shaping-hearth-barbecue-and-outdoor-living-in-2025